Rae Dunn Inspired Christmas Tree Ornaments
- Anna L. Calvin
- Nov 11, 2018
- 3 min read
I know it's November which raises one of the MOST IMPORTANT debates - is it too early to decorate for Christmas? If you grew up in a household like I did, the answer to that question would be yes. My mom's rule was no Christmas music until after Thanksgiving. In fact, on the car ride home from Thanksgiving dinner, we'd play Christmas music the whole way home. Well, 8 years ago this rule changed for me when Seth and I started dating. My husband LOVES Christmas. He's the type that will listen to Christmas music in July. Our first date was at the Toledo Zoo to see the Christmas Lights. Christmas time is so special to us because it's when we first became a "we" and since being married, we enjoy spending the time with all of our friends and especially our family.
Seth and I have not started decorating for Christmas yet but we did go Christmas decoration shopping yesterday. (Yes, I will admit I went to Hobby Lobby 2x in one day...) We probably won't start decorating until the day after Thanksgiving... but we'll see!
As you all know, I'm all about Pinterest and DIY's. I found the ever so popular Rae Dunn ornaments and fell in love. Seth and I have red and black buffalo check christmas decorations so when I saw the ornaments, I just knew I had to have them. Thus the reason for this post and the reason for 1 of the Hobby Lobby trips yesterday. Etsy sells these ornaments for $20 for 4 ornaments... no thanks. Instead, I made 12 ornaments for $21.
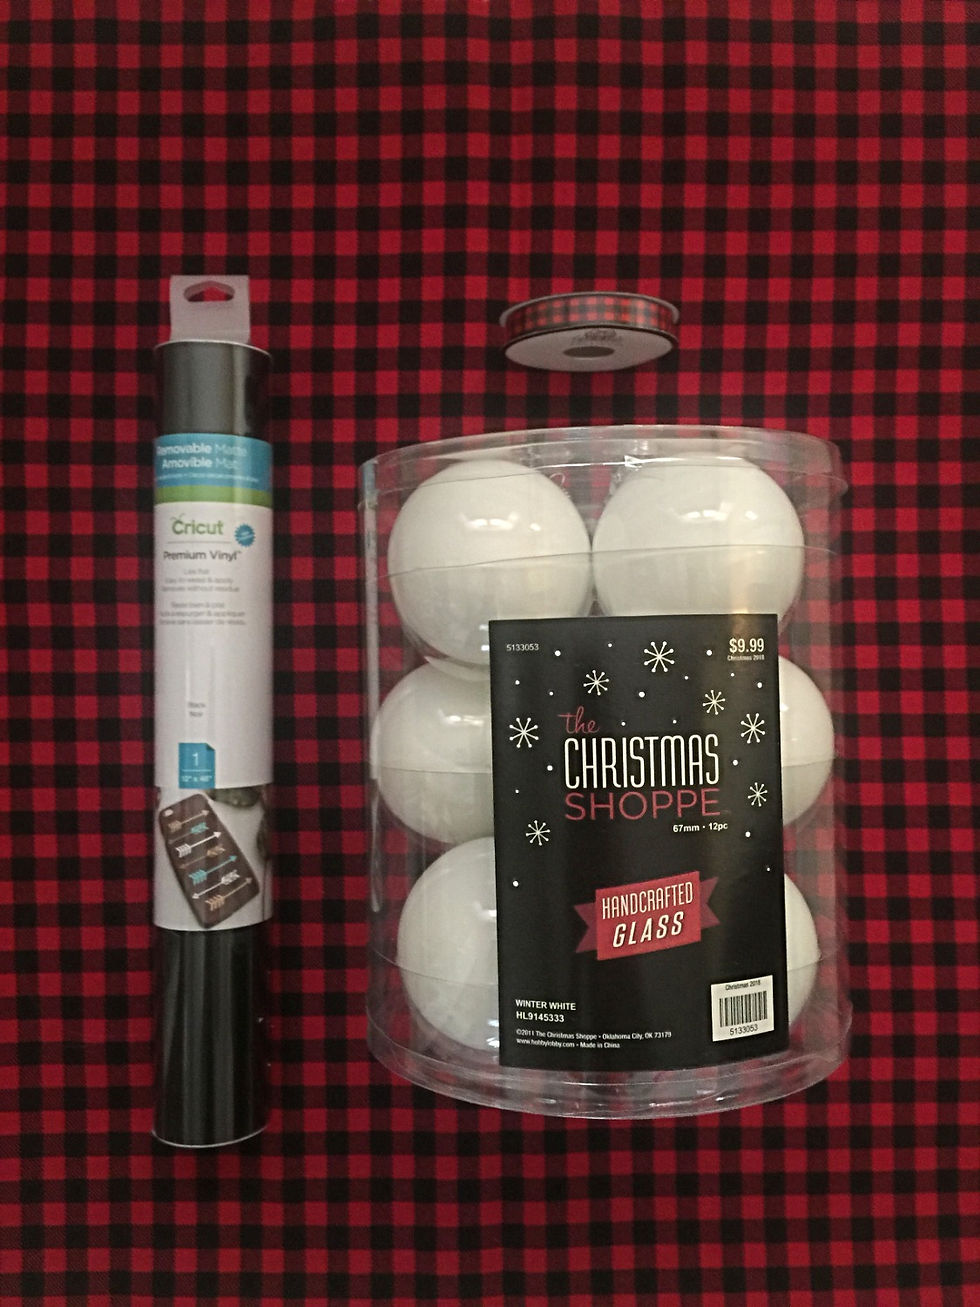
Here's what I needed in order to make these:
1. White ornaments - $5 for 12 ornaments at Hobby Lobby
2. Black vinyl - $8
3. Small ribbon - $2
4. Transfer Tape - $6 (Not pictured because I already had some)

The first thing I did was opened Cricut Design Space and started coming up with words that I want on our ornaments. You can do winter words like snow, winter, cold, coco, snowman, etc or you can do Christmas words like jolly, joy, noel, believe, cheer, etc. I've seen cute ornaments on Pinterest too that use the 12 reindeer and do 11 of the names in white ornaments and Rudolph is a red ornament. Truly it's whatever you want and be creative! I chose 12 words and typed them in Design Space. I originally download a font called "The Skinny" but then I found that Cricut Access has a very similar font called "Kyden" that is perfect for Rae Dunn inspired projects. I made all of my words 1 in tall.

When my words were typed and all the same height, I was ready to cut. I cut black vinyl to fit on my cutting mat and loaded it into my Cricut.

Then I let my Cricut do all the cutting.

Once my words were cut, I weeded out the background so I was left with my words. This part you have to be careful with because the letters are so thin, they can get weeded with the background easily. I had to recut a few of my words since a letter or two got pulled off with my background.

After my weeding was done, I cut transfer tape to go on top of my words.

And then I placed the tape on my words. I used a hard surface to make sure the letters stuck to my transfer tape.


Next, I peeled the transfer tape with my letters and placed the letters on an ornament. Since ornaments are circular, the tape didn't lay perfectly. Just be sure there aren't any gaps or bubbles when placing your letters.


Lastly, I peeled off my transfer tape and I added some ribbon. Then my ornaments were done.


I'm SO happy with how these turned out! I can't wait to decorate our tree in a few weeks.


Comments